


Apr 4, 2023
No comments:
AshGourd Juice ~ Fresh Juices
Ash Gourd Juice has become popular lately, as people are getting the awareness around the medical benefits of this wonder fruit. I have heard this from Sadguru talks first and then from my mom, and from my cousin. So after convinced with these medical benefits, i have decided to attempt to make this powerful Juice that is full of medicinal values. After making it and tasting it, it is so easy to make and tastes good. Ok, don't expect it to be taste like Sugarcane Juice, but it is not as bad as Karela (BitterGourd) juice either. Actually it didn't have strong taste or flavor. This looks/tastes as cool as coconut water, but gives the twice energy boost that is equivalent to coffee, while keeping you calm (with out making you hyper or excited as Coffee does to you). :-)
The hardest part in this recipe is peeling and chopping the AshGourd. AshGourd is thick and looks tough from outside, it won't be encouraging to process it quickly. If you just make an attempt with chopping, it is very easy and piece of a cake. (please check the video below or on my channel for quick instructions). Here is the recipe for you, Njoy!
 |
| Ash Gourd Juice |
Ingredients:
AshGourd - 1/8 of Medium Size Gourd
*servings - 4
Method:
- Remove the outer edge and inner core and seeds of the Ash Gourd Quarter
- Chop the wedges into medium size cubes
- Add these pieces to NinjA bullet and grind in Extract mode for 10 sec
- Add some water to jar and pulse in Smoothie mode for 20 sec
- Strain the juice using colander and remove the excess pulp
- Pour into glasses and serve immediately
- You don't need to add any sugar to this juice. If you feel it is strong in flavor, you can add pinch of salt or lime juice for added flavor.
- This juice is very cool naturally, if you like chilled version, you can add 2 ice cubed while serving
- You can use NinjA bullet or Magic Bullet also to extract the juice. NinjA bullet is my new addition from last year Thanksgiving purchase. I am so happy with this purchase and keeping it to full use.
- I buy the Green Pumpkin Quarter at India Store (Patel Brothers) in states.
- This year my neighbor shared many long AshGourds from her Garden Yield.

 |
| My Healthy Breakfast Plate :-) |
Will be back with another simple recipe, Take care until then
Keep Smiling and Spread the Joy!
-Mythreyi
Read more ...
Mar 12, 2023
No comments:
DIY - Rosemary Hibiscus Coconut Oil (for Hair Nourshing)
During my childhood I have witnessed, Hibiscus playing vital role as part of natural Hair Care remedies. My Grand ma used to mix Hibiscus Leaves with Soapnut water (Kunkundu Kaya Rasam in Telugu), which was a natural Shampoo in those days. Mom used to make Hibiscus flower infused Hair Oil, that helps with hair growth, strong roots and replenish the hair. As my patio garden showered many Hibiscus flowers last year, after making fresh Hibiscus Herbal Tea, i have dried few flowers and saved, those came in handy to make this DIY - Rosemary Hibiscus Coconut Oil. As I love the smell of Rosemary herb and and it is known as good natural hair care agent, i have enhanced my mom's Hibiscus Coconut Oil recipe infused with Rosemary flavor. Here is the recipe, enjoy!

Ingredients:
Coconut Oil - 2 cups
Hibiscus Flowers - 6 to 8 (dried, red color is preferred)
Rosemary Strands - 5 to 6 (3 inch stems)
Method:
- Take Coconut Oil in a steal pot ( with heavy bottom). Keep it on the stove on low heat.
- Add rosemary strands in the oil, simmer for 2 min
- Add dried hibiscus flowers or petals to the oil and simmer for 2 min
- Increase the heat to medium, boil for 3 min, by now you will notice the oil color changing
- Switch off the stove, close the lid for 5 min, to let it cool off
- Then strain into a wide mouth vessel with a strainer to remove all the hibiscus and rosemary strands
- Carefully pour into a glass bottle and store in the dark place
- Apply this oil to your hair weekly once, leave it for 1 hour, then wash your hair. (this routine helps to nourish your hair).

- Only Red Color Hibiscus Flowers are preferred for this recipe
- Coconut Oil i have used in this recipe, i got from our beloved Costco. :-)
- You can reuse the soy-sauce glass bottles to store oils like these (reminder to reduce, reuse, recycle policy)
Read more ...
Nov 25, 2022
No comments:
Vegan Corn Chowder Soup ~ Soup Recipes
This recipe is on my 'recipes to try' list from long time, actually long long time, when we visited Pier 39 in the Bay Area in California in 2014. Clam Chowder served in a sourdough bread is a popular recipe on this pier, since I am not a fan of Seafood, i couldn't dare to try any Clam Chowder on the pier at that time, but I was determined to make a Veggie version of Chowder since then. Now it is happening, I wanted to try a simple soup recipe for this Thanksgiving potluck, i made this Vegan Corn Chowder recipe, that is thick, creamy and makes it very filling, however I made it little spicy in my version, that made it a popular hit at the table for our Indian Guests. And one more thing, finally i get to use my crock pot (slow cooker) for the first time that I bought couple of years ago as part of the Thanksgiving Sale. I am so thankful for this crock pot and this recipe, where you have to keep all the ingredients in the crock pot and let it take care of itself. Loved that two pending things on my list are done #1making this soup and #2 using my Crock-pot, :-) here is the recipe for you, Njoy!


Ingredients:
Oil - 1 Tbsp
Onion - 1 medium
Cumin Powder - 1 tsp
Potato - 4 medium (Russet Potato)
Carrot - 1 medium (optional)
Jalapeno - 1 (Optional)
Red Chili Powder - 1 Tbsp
Coriander Powder - 1 tsp
Turmeric - 1/2 tsp
Oregano - 2 strands
Sweet Corn - 16 oz (frozen variety) (if you are using fresh, use 4 cups of sweet corn)
Water - 1/2 cup
Coconut Milk - 1 can (16 oz)
Vegetable Broth - 32 oz ( 1 box) ( i have used plant based broth, low sodium)
Salt - 2 tsp salt ( as per your taste)
Lime Juice - 1 Tbsp (Optional)
Preparation:
Peel and Chop Onion into medium size cubes. Peel and chop potato into medium size cubes. If you are using carrot, trim edges, peel and chop into small size chunks. Thaw frozen corn in microwave and reserve 1/2 cup of corn (to add at the end)
Method:
- Heat the non-stick pan, add oil to it. Once oil is hot, add chopped onion, jalapeno and saute for 2 min, add cumin powder, turmeric powder and saute for 2 more min
- Add chopped potato, carrot, mix with onions and close the lid let it cook until outer edges becomes soft, add 1/2 cup water, coriander powder, red chili powder and cook on medium heat until potatoes become soft.
- Add thawed corn to the pan, mix it well and cook for 5 min. After 5 min, everything becomes soft, use a potato masher and mash it nicely in the pan.
- Start the Crock-pot in High mode for 4 Hours. Transfer the contents from pan to crock pot, add oregano strands, vegetable broth, taste and adjust salt as needed and close the crock-pot lid and let it cook
- After 2 hours, add the can of coconut milk to the crock pot and give it a stir and close the lid and cook for remaining 2 hours
- Finally add reserved corn and lime juice to the pot right before serving.
- Transfer to bowl, serve warm with a side of dinner roll or your favorite bread. You can garnish with few jalapeno rounds for extra kick.

This soup is not very heavy like other creamy soups, but it is thick with loaded potatoes and has apt amount of creaminess from coconut milk, has enough warmth with lot of spice flavors. Trust me, Nobody won't say No to this soup, and your guests will go for second round for sure! :-)
Notes:
- Making this soup in crock-pot gives couple benefits, the process of slow cooking gives additional taste to the soup, and also it keeps the soup hot for longer period. (that makes it convenient avoids single serving heating separately)
- If you don't have crock pot, you can use the same recipe in InstaPot with Soup or slow cook option
- If you use russet potatoes, they cook faster and becomes soft. Otherwise, if your potatoes doesn't become soft easily with potato masher, then you can mash it in with the hand blender.
- If you want to make this soup overnight, in step#4 start the crock pot in Low mode for 8 hours, on the night before your party.
- After adding coconut milk, if you feel like soup became thick, you can add more vegetable broth until you get the consistency you want. (make sure to taste and adjust salt as needed)
Check out my other Soup Recipes:
will be back with another easy recipe
until then keep smiling and spread the joy!
-Mythreyi
Read more ...
Jan 16, 2022
No comments:
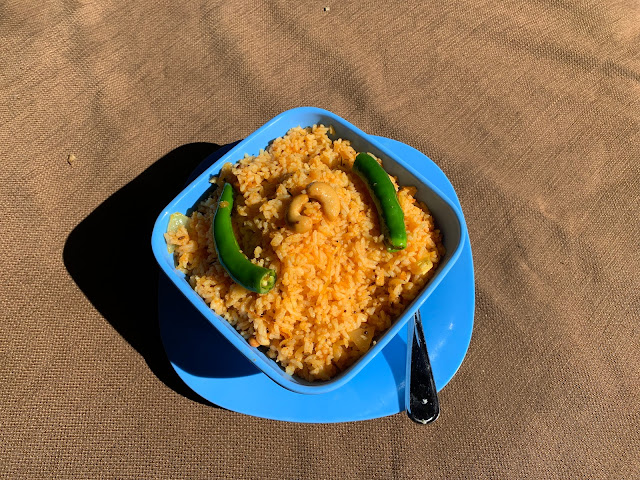
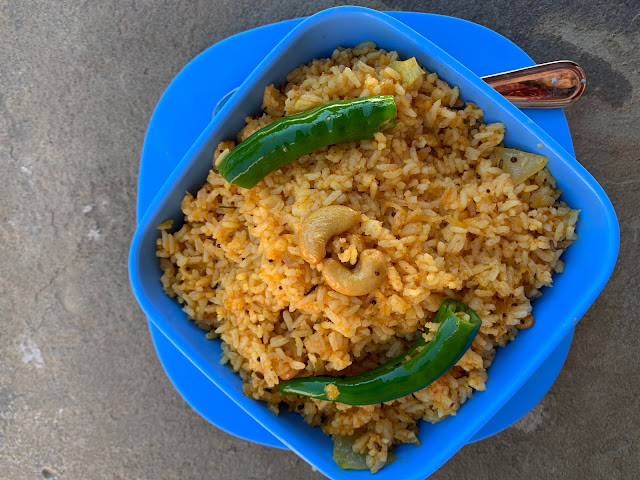
Bagara Rice with Left Over Rice
When ever there is left over rice, Pulihora (Lemon Rice) happens with out any second thought at our home as it is our family's favorite. Sometimes i get bored and usually try variety rice recipes, today I have tried this Hydrabadi Bagara Rice that goes well with Chicken Fry or Stuffed Brinjal (Gutti Vankaya) recipe. The recipe is so simple and you can convert left over rice to exotic rice dish. Here is the recipe, Njoy!
Ingredients:
Cooked White Rice - 2 cups
Oil - 1 Tbsp
Ghee - 1 Tbsp
Cumin Seeds - 1/2 tsp
Mustard Seeds - 1 tsp
Curry leaves - 10
Onion - 1/2 (sliced vertically)
Green Chili - 2
Cilantro - 1/4 cup
Salt - 1 tsp
Red Chili Powder - 1 tsp
Cashew Nuts - 6 (whole)
Method:
- Heat kadai on the stove, add Oil, once it is hot, add cumin seeds followed by mustard seeds and curry leaves.
- Once curry leaves start spluttering, add sliced green chili and onions. Saute until onion becomes translucent.
- Add Red Chili Powder and infuse the oil with spices. Add cashew nuts and mix with spices.
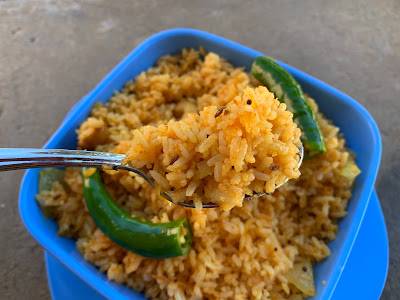
- Add cooked white rice to the Kadai and mix well with onion and spices. stir-fry on high flame.
- Add salt now to the rice and mix well. taste and adjust the salt and seasoning. Add chopped cilantro to the rice. Finally top with 1 tbsp Ghee and mix well.
- Bagara Rice is ready, transfer to serving bowl and serve hot immediately with gravy dish.
Quick Mexican Rice
Coriander / Cilantro Rice
Chicken Masala Rice
Read more ...
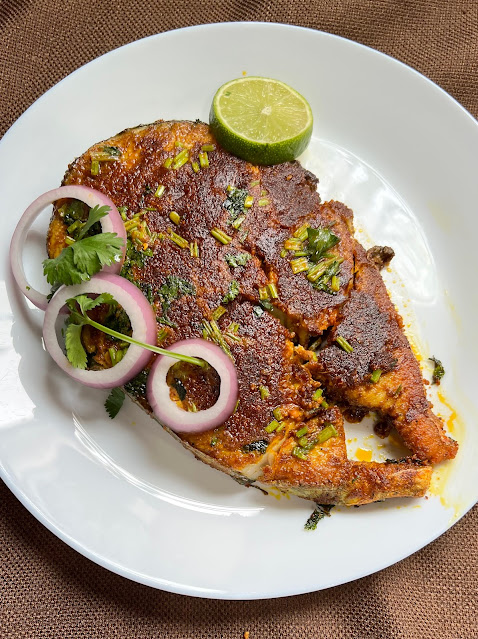
Vanjaram Vepudu ~ King Fish Fry
This year (2022) I have started trying new fish varieties on our recent Florida Trip. I always have desire to try many sea food recipes, as they are considered lean meat and rich in omega 3 fatty acids which is rear to get in any veggies. But i can't deal with being to Fish Market to buy fish, as it sounds very Fishy to me. So mostly my easy avenue is Tilapia Filets either i get from Sprouts or Costco. Recently during my visit to Farm2Cook store, I was surprised to see many fish varieties that are neatly packed and organized. They have King Fish, Red Snapper, Pomfret, Tilapia etc, at last found a store where i don't have to deal with any fishiness in buying Fish. With that note, I will be bringing many Fish Recipes this year, so stay tuned, for today I am settling with this King Fish, it is called Vanjaram in Telugu. This recipe takes less than 30 minute from prep to cook to serve. Why late, make it today and impress your family, here is the recipe, Enjoy!

Ingredients:
King Fish - 2 Filet ( 1/2 kg)
Oil - 2 Tbsp
Onion, Cilantro, Lime Slices - for garnish
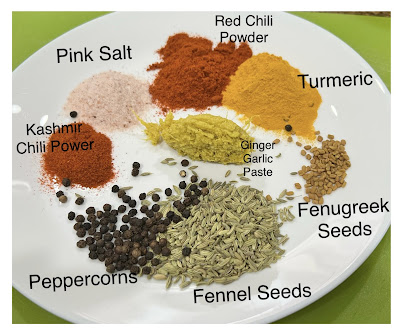
For Masala
Fenugreek seeds - 1 tsp
Fennel seeds - 1 Tbsp
Peppercorns (whole) - 2 tsp
Pink Salt - 1 Tbsp (adjust to your needs, if you eat less salt)
Red Chili Powder - 1 Tbsp
Turmeric Powder - 2 tsp
Kashmiri Chili Powder - 2 tsp (this gives nice color)
Ginger Garlic Paste - 1 Tbsp
Lime - 1/2
Preparation:
- First grind Fenugreek, Fennel, Peppercorns in small mixie jar until it becomes coarse powder. Then add Salt, Turmeric, Red Chili Powder and grind again into fine powder. Add Kashmiri Chili powder, Ginger Garlic Paste, 1/2 Lime Juice and grind again until it becomes thick paste and set aside. Marinade Masala is ready.
- Wash Fish filets gently under lukewarm water. Apply this paste on both sides of filets, cover with lid and marinate for 15 min.
- Cut Red Onion, 1/2 Lime in circles and chop cilantro for Garnish.
Method:
- Heat wide heavy saute pan on the stove. Add 2 Tbsp oil to it.
- Once the oil is hot, add marinated fish filet gently and cook them on medium for 5 min.
- Add cilantro on top, turn them over and cook for 5 min on other side. And again repeat this step one more time until the filets are cooked on all sides. You will notice it becomes soft and flaky. If you want charred effect, roast on high for 2 min. (that's what I did)
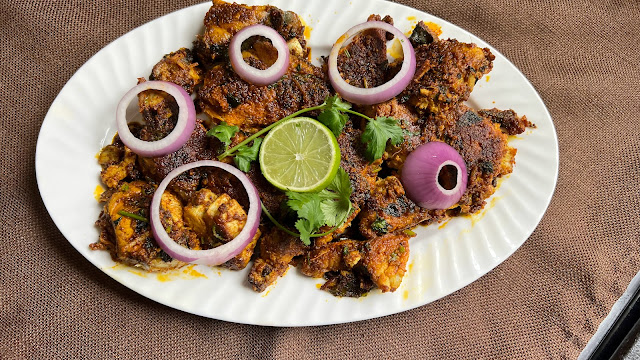
- Transfer each filet carefully to serving plate and decorate with onion/lime garnish and serve immediately as an appetizer.
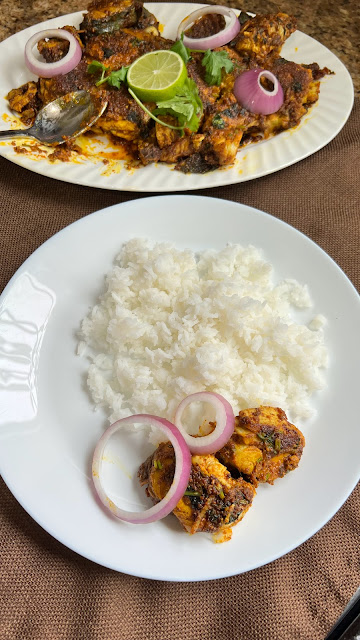
- Or you can break the pieces gently and saute them again in the pan for 5 min, until all sides of pieces get charred effect and transfer to a plate and serve with white rice.
Notes:
- Kashmiri Red Chili Powder adds nice color. If you already have bright red chili powder, then you can skip this in masala.
- Making this masala fresh is the secret of the success for this recipe. I suggest always make this masala fresh when you are making this recipe. It is very easy and quick to make. No need to roast the spices for this masala.
- This might be little spicy for kids, serve with Ghee Rice for kids. Grown-ups at our home thoroughly enjoyed the spicy version as it is as an Appetizer.
Read more ...